Mastering XCUIElement Identification for iOS Using Appium Inspector
In the world of mobile test automation, Appium stands out as a versatile tool for both Android and iOS platforms. When it comes to iOS, finding and interacting with UI elements can be particularly challenging due to the complexities of Apple’s UI framework. This is where Appium Inspector comes into play, providing a powerful interface to identify and interact with
XCUIElement objects. In this blog, we will explore how to use Appium Inspector to find XCUIElement identifiers for your iOS application, enabling you to write robust and effective test scripts.
What is Appium Inspector?
Appium Inspector is a tool that mirrors the UI of your mobile application on your computer. It allows you to interact with the app’s UI elements, inspect their properties, and generate locator strategies. For iOS applications, these elements are referred to asXCUIElement, a class in Apple’s XCTest framework used for UI testing.
Setting Up Appium Inspector for iOS
Before diving into element identification, ensure you have the necessary setup:- Install Appium Server: Download and install Appium from the official website.
- Install Appium Desktop: Appium Desktop includes the Inspector tool. Download it from the Appium Desktop GitHub repository.
- Configure Xcode and iOS Device:
- Ensure Xcode is installed and configured.
- Connect your iOS device or set up an iOS simulator.
- Enable Developer Mode on your iOS device.
Launching Appium Inspector
- Start Appium Server: Open the Appium Desktop application and start the server.
- Configure Desired Capabilities: Define the desired capabilities for your iOS application. These are key-value pairs that specify the configurations needed for your Appium session. Below is an example of desired capabilities for an iOS device:
{ "platformName": "iOS", "platformVersion": "14.4", "deviceName": "iPhone 12", "app": "/path/to/your/app.app", "automationName": "XCUITest" } - Start a Session: Click on the “Start Session” button in Appium Desktop after entering the desired capabilities. This will launch the Appium Inspector with your iOS app.
Using Appium Inspector to Find XCUIElements
Once the Appium Inspector is open, you can begin locating elements within your iOS application:- Navigate the UI:
- The Inspector window will display the current screen of your application.
- You can interact with the app directly through the Inspector, similar to how you would on an actual device.
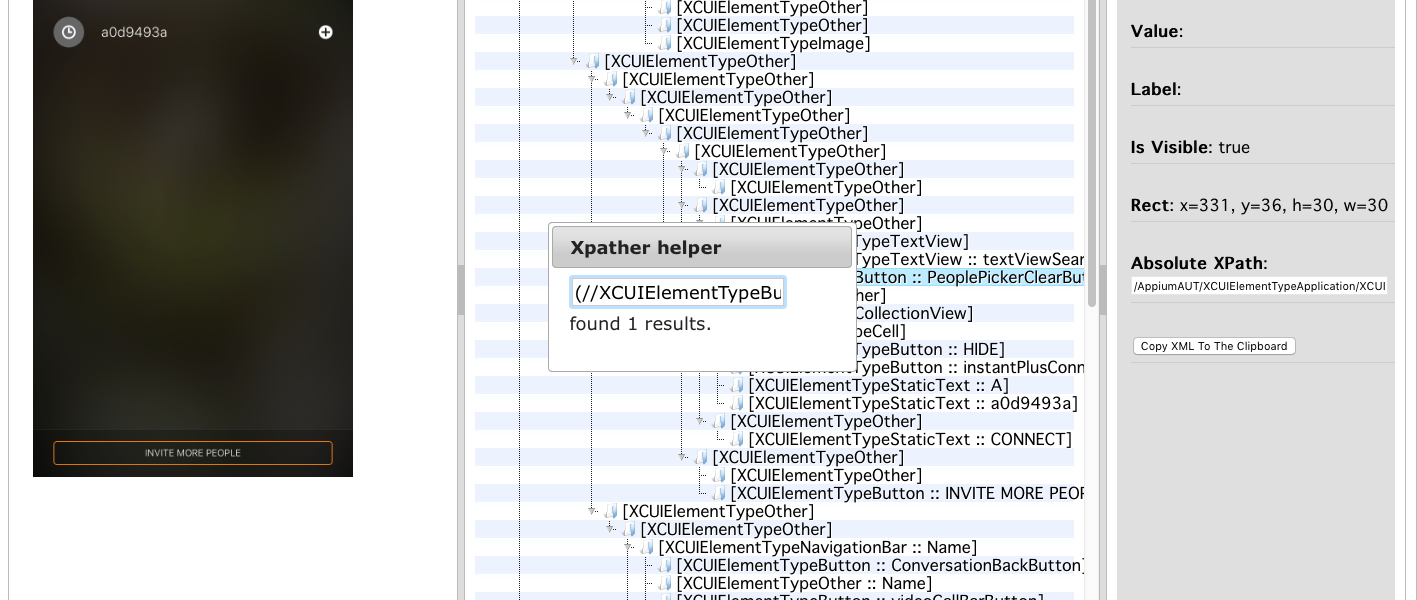
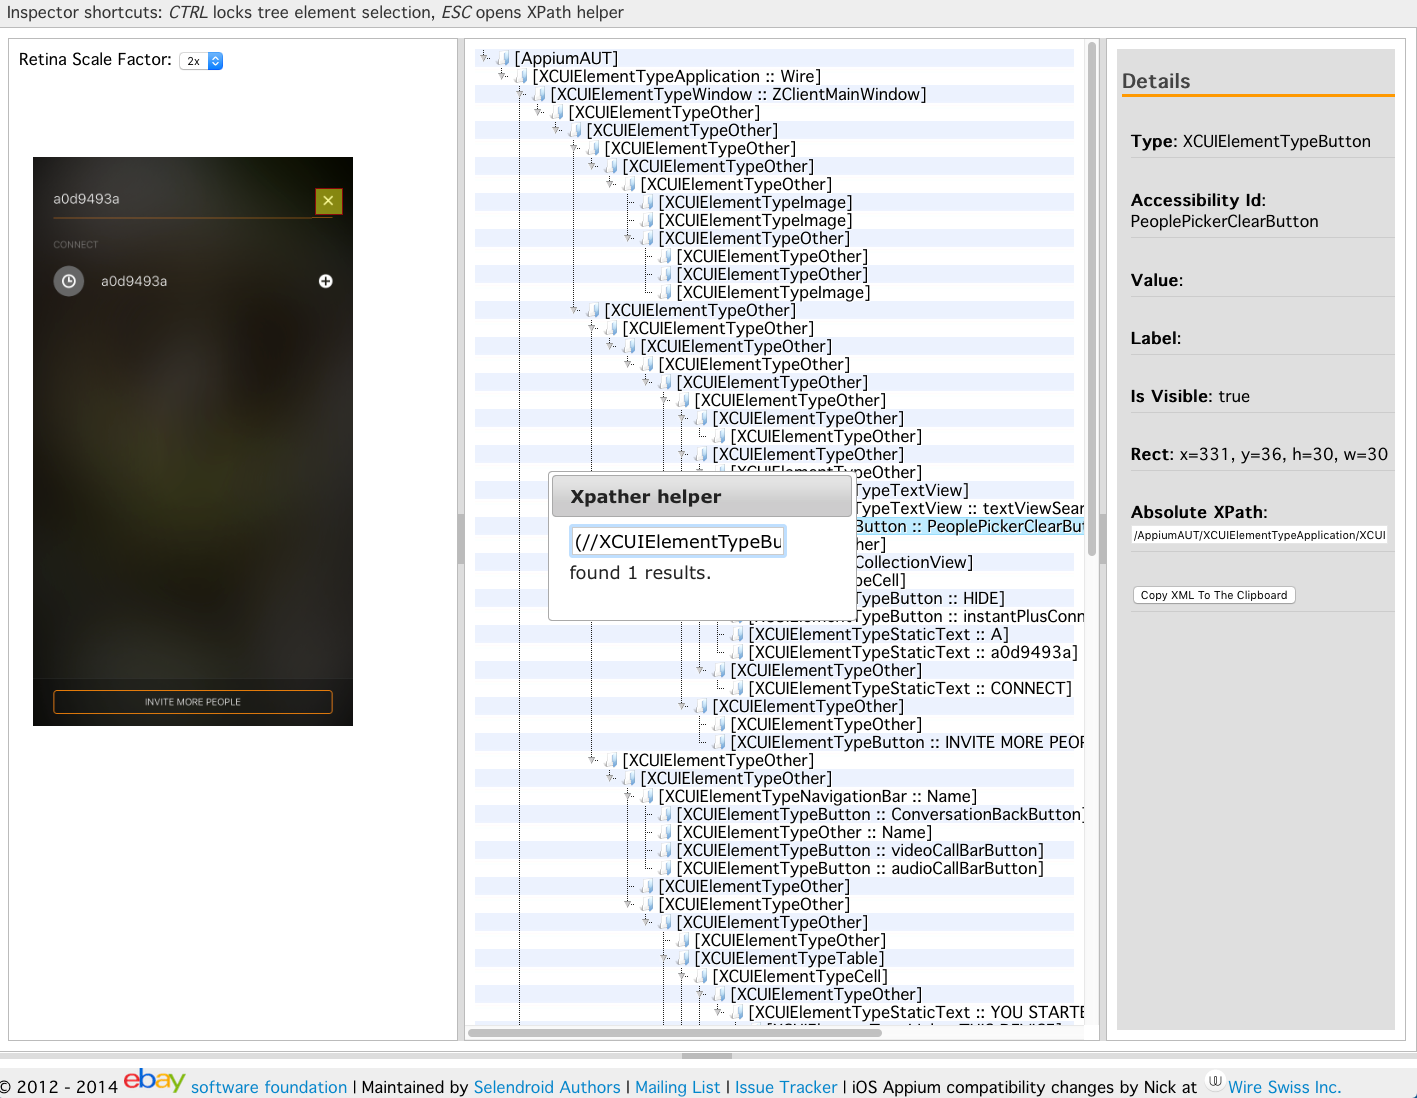
- Inspect Elements:
- Click on elements in the mirrored app screen to select them.
- The right-hand panel will display the properties of the selected element, including its
XCUIElementType, accessibility ID, label, value, and XPath.
- Extracting Locators:
- Accessibility ID: Use the
nameattribute (often the accessibility ID) for locating elements. - XPath: Appium Inspector generates an XPath for the selected element. Copy this XPath for use in your test scripts.
- Class Chain: Appium supports iOS Class Chain queries, which are faster than XPath for locating elements.
- Accessibility ID: Use the
Using RobotQA Live Testing for Inspection
RobotQA live testing offers inspection of XCUIElement for iOS. You do not need any configuration etc. RobotQA used Appium Inspector by default on live testing page for inspection. Just upload your application file, connect a iOS phone then start the inspection. Need testing? – Try RobotQA and Start Testing on Real Devices. Start Free Trial