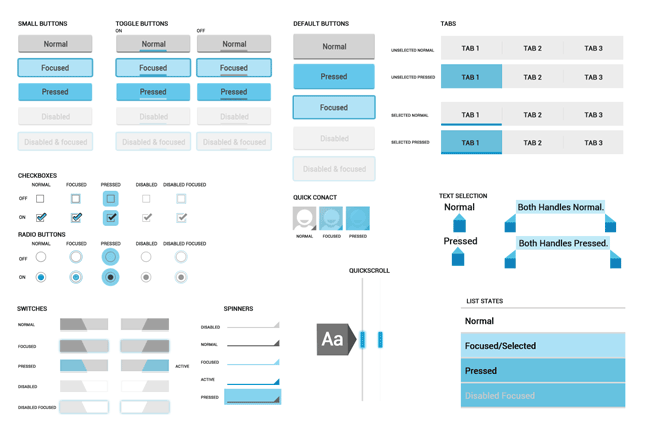
Creating a Classic Android UI with Holo Light Theme

The Holo Light theme provides a clean and bright user interface that follows the design principles of early Android versions. While Material Design has taken over for newer applications, the Holo themes are still useful for maintaining a consistent look in apps targeting older Android versions. In this blog, we’ll walk through the steps to implement a simple Android UI using the Holo Light theme.
Setting Up the Holo Light Theme
First, we need to set up the Holo Light theme in our Android project. This involves modifying the theme settings in your project’s manifest file.
Step 1: Define the Holo Light Theme in the Manifest
Open your AndroidManifest.xml file and set the theme for your application or activity.
<manifest xmlns:android="http://schemas.android.com/apk/res/android"
    package="com.example.hololighttheme">

    <application
        android:allowBackup="true"
        android:icon="@mipmap/ic_launcher"
        android:label="@string/app_name"
        android:roundIcon="@mipmap/ic_launcher_round"
        android:supportsRtl="true"
        android:theme="@android:style/Theme.Holo.Light">
        <activity android:name=".MainActivity">
            <intent-filter>
                <action android:name="android.intent.action.MAIN" />
                <category android:name="android.intent.category.LAUNCHER" />
            </intent-filter>
        </activity>
    </application>

</manifest>
By setting android:theme="@android:style/Theme.Holo.Light", we ensure that the entire application or the specific activity uses the Holo Light theme.
Example: Creating a Simple Login Screen
Let’s create a simple login screen using the Holo Light theme.
Step 2: Define the Layout
Create an XML layout file (activity_main.xml) with the following content:
<RelativeLayout
    xmlns:android="http://schemas.android.com/apk/res/android"
    android:layout_width="match_parent"
    android:layout_height="match_parent"
    android:padding="16dp">

    <TextView
        android:id="@+id/label"
        android:layout_width="wrap_content"
        android:layout_height="wrap_content"
        android:text="Enter your name:"
        android:textSize="18sp"
        android:layout_alignParentTop="true"
        android:layout_centerHorizontal="true"
        android:textColor="@android:color/black"/>

    <EditText
        android:id="@+id/nameEditText"
        android:layout_width="match_parent"
        android:layout_height="wrap_content"
        android:hint="Name"
        android:layout_below="@id/label"
        android:layout_marginTop="16dp"
        android:layout_centerHorizontal="true"/>

    <Button
        android:id="@+id/loginButton"
        android:layout_width="wrap_content"
        android:layout_height="wrap_content"
        android:text="Login"
        android:layout_below="@id/nameEditText"
        android:layout_marginTop="16dp"
        android:layout_centerHorizontal="true"/>

    <TextView
        android:id="@+id/forgotPasswordTextView"
        android:layout_width="wrap_content"
        android:layout_height="wrap_content"
        android:text="Forgot password?"
        android:textColor="@android:color/holo_blue_light"
        android:layout_below="@id/loginButton"
        android:layout_marginTop="16dp"
        android:layout_centerHorizontal="true"/>
</RelativeLayout>
Step 3: Initialize in Activity
In your MainActivity.java or MainActivity.kt file, initialize the views and add any necessary functionality.
Java
package com.example.hololighttheme;

import android.os.Bundle;
import android.widget.Button;
import android.widget.EditText;
import android.widget.TextView;
import android.widget.Toast;
import androidx.appcompat.app.AppCompatActivity;

public class MainActivity extends AppCompatActivity {

    @Override
    protected void onCreate(Bundle savedInstanceState) {
        super.onCreate(savedInstanceState);
        setContentView(R.layout.activity_main);

        EditText nameEditText = findViewById(R.id.nameEditText);
        Button loginButton = findViewById(R.id.loginButton);
        TextView forgotPasswordTextView = findViewById(R.id.forgotPasswordTextView);

        loginButton.setOnClickListener(v -> {
            String name = nameEditText.getText().toString();
            if (name.isEmpty()) {
                Toast.makeText(MainActivity.this, "Please enter your name", Toast.LENGTH_SHORT).show();
            } else {
                // Perform login action
                Toast.makeText(MainActivity.this, "Welcome, " + name, Toast.LENGTH_SHORT).show();
            }
        });

        forgotPasswordTextView.setOnClickListener(v -> {
            // Handle forgot password action
            Toast.makeText(MainActivity.this, "Forgot password clicked", Toast.LENGTH_SHORT).show();
        });
    }
}
Kotlin
package com.example.hololighttheme

import android.os.Bundle
import android.widget.Button
import android.widget.EditText
import android.widget.TextView
import android.widget.Toast
import androidx.appcompat.app.AppCompatActivity

class MainActivity : AppCompatActivity() {

    override fun onCreate(savedInstanceState: Bundle?) {
        super.onCreate(savedInstanceState)
        setContentView(R.layout.activity_main)

        val nameEditText: EditText = findViewById(R.id.nameEditText)
        val loginButton: Button = findViewById(R.id.loginButton)
        val forgotPasswordTextView: TextView = findViewById(R.id.forgotPasswordTextView)

        loginButton.setOnClickListener {
            val name = nameEditText.text.toString()
            if (name.isEmpty()) {
                Toast.makeText(this, "Please enter your name", Toast.LENGTH_SHORT).show()
            } else {
                // Perform login action
                Toast.makeText(this, "Welcome, $name", Toast.LENGTH_SHORT).show()
            }
        }

        forgotPasswordTextView.setOnClickListener {
            // Handle forgot password action
            Toast.makeText(this, "Forgot password clicked", Toast.LENGTH_SHORT).show()
        }
    }
}
Conclusion
Using the Holo Light theme allows you to create clean, bright, and classic Android UIs that are consistent with early Android design guidelines. This example demonstrated how to set up a simple login screen using the Holo Light theme, showing how to define the theme in your manifest, create a corresponding layout, and initialize the views in your activity. By following these steps, you can easily implement the Holo Light theme in your own Android projects. Happy coding!
