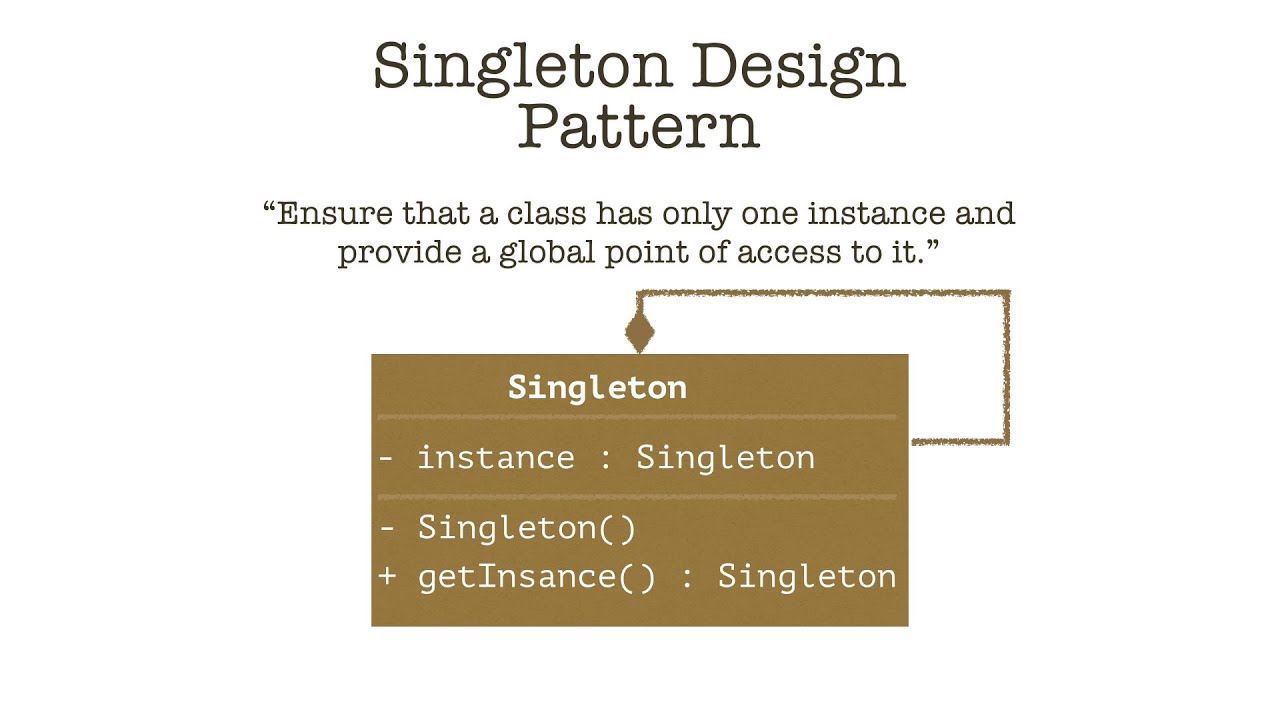
The Singleton pattern is a design pattern used to restrict the instantiation of a class to a single instance. This is particularly useful in scenarios where a single instance of a class should control the coordination of actions or state across the system, such as in managing network connections, databases, or shared resources. In this blog, we'll explore how to implement and use the Singleton pattern in Android using Java.
Why Use the Singleton Pattern?
- Resource Management: Ensure only one instance of a resource-heavy class, like a database manager or network client.
- Global Access: Provide a global point of access to a class instance.
- Control Instantiation: Control the number of instances created, which can be crucial for resource management and avoiding conflicts.
Implementing Singleton Pattern in Android
Let's create a simple example to demonstrate how to implement a Singleton in Android. We'll create a Singleton class that manages a simple string message.
Step 1: Define the Singleton Class
Create a Singleton class with a private constructor and a static method to get the single instance.
|
1 2 3 4 5 6 7 8 9 10 11 12 13 14 15 16 17 18 19 20 21 22 23 24 25 26 27 28 29 |
public class SingletonExample { // The single instance of the class private static SingletonExample instance; // An example field to demonstrate functionality private String message; // Private constructor to prevent instantiation private SingletonExample() { message = "Hello from Singleton!"; } // Public method to provide access to the instance public static synchronized SingletonExample getInstance() { if (instance == null) { instance = new SingletonExample(); } return instance; } // Getter and setter for the message public String getMessage() { return message; } public void setMessage(String message) { this.message = message; } } |
Step 2: Use the Singleton in an Activity
Now, let's see how to use this Singleton class in an Android activity.
|
1 2 3 4 5 6 7 8 9 10 11 12 13 14 15 16 17 |
public class MainActivity extends AppCompatActivity { @Override protected void onCreate(Bundle savedInstanceState) { super.onCreate(savedInstanceState); setContentView(R.layout.activity_main); // Get the Singleton instance SingletonExample singleton = SingletonExample.getInstance(); // Set a new message singleton.setMessage("Singleton Pattern in Android"); // Retrieve and display the message TextView textView = findViewById(R.id.textView); textView.setText(singleton.getMessage()); } } |
Step 3: Layout for Activity
Define the layout for the activity (activity_main.xml).
|
1 2 3 4 5 6 7 8 9 10 11 12 13 |
<?xml version="1.0" encoding="utf-8"?> <RelativeLayout xmlns:android="http://schemas.android.com/apk/res/android" android:layout_width="match_parent" android:layout_height="match_parent" android:padding="16dp"> <TextView android:id="@+id/textView" android:layout_width="wrap_content" android:layout_height="wrap_content" android:text="Default Text" android:textSize="18sp" /> </RelativeLayout> |
Advantages of Singleton Pattern
- Controlled Access to a Single Instance: Ensures only one instance is used throughout the application, providing controlled access to resources.
- Reduced Memory Footprint: Avoids the overhead of creating multiple instances of a class, which can be resource-intensive.
- Consistency: Ensures consistent behavior across different parts of the application as they interact with the same instance.
Considerations and Best Practices
- Thread Safety: Ensure thread safety when implementing the Singleton pattern, especially in multi-threaded applications. The example above uses
synchronizedto ensure thread safety. - Lazy Initialization: The instance is created only when it is needed, reducing initial memory usage.
- Avoiding Memory Leaks: Be cautious of memory leaks, especially in Android where activities and contexts can easily cause leaks. Avoid holding strong references to activity contexts in your Singleton.
Conclusion
The Singleton pattern is a powerful tool for managing shared resources and ensuring consistent behavior across your Android application. By implementing a Singleton, you can control instantiation, reduce memory usage, and provide a global access point to important resources. Following the example and best practices outlined in this blog, you can effectively use the Singleton pattern in your Android projects. Happy coding!